Ubuntu 22.04 LTS Installation Guide
Ubuntu 22.04 LTS (Jammy Jellyfish) is a long-term support (LTS) release of the popular Linux operating system, launched in April 2022. This version brings major improvements in performance, security, and ease of use, with a new dark Yaru desktop theme by default, better Raspberry Pi support, an updated Linux kernel, and the latest development tools.
Ubuntu 22.04 is known for its relatively low hardware demands compared to other modern OSes. For an optimal experience, however, at least 4 GB of RAM and 25 GB of disk space are recommended. You can install Ubuntu alongside other operating systems or as the only OS on your computer.
System Requirements for Ubuntu 22.04
- Processor: Dual-core CPU at 2 GHz or better
- RAM: Minimum 4 GB (8 GB or more recommended)
- Storage: 25 GB free space (50 GB recommended)
- Graphics: Graphics card capable of 1024×768 resolution
- Install Media: USB drive of 4 GB or larger (USB 3.0 recommended)
- Display: Minimum resolution of 1024×768
- Internet Connection: Recommended for updates
- Boot: BIOS or UEFI compatible
Follow these 23 detailed steps to install Ubuntu 22.04 LTS on your computer. Each step includes a reference image you can enlarge by clicking it.
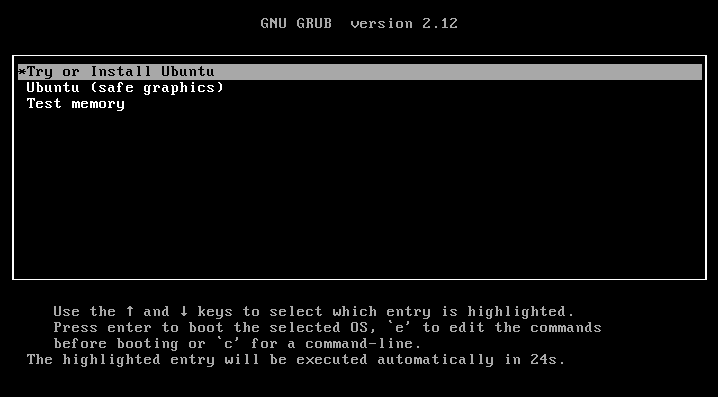
Start the Installation
Insert the installation USB and choose "Try or Install Ubuntu" by pressing Enter.
Click on the image to enlarge
Loading the Installation Interface
Wait for the Ubuntu Desktop Installation Interface to load.

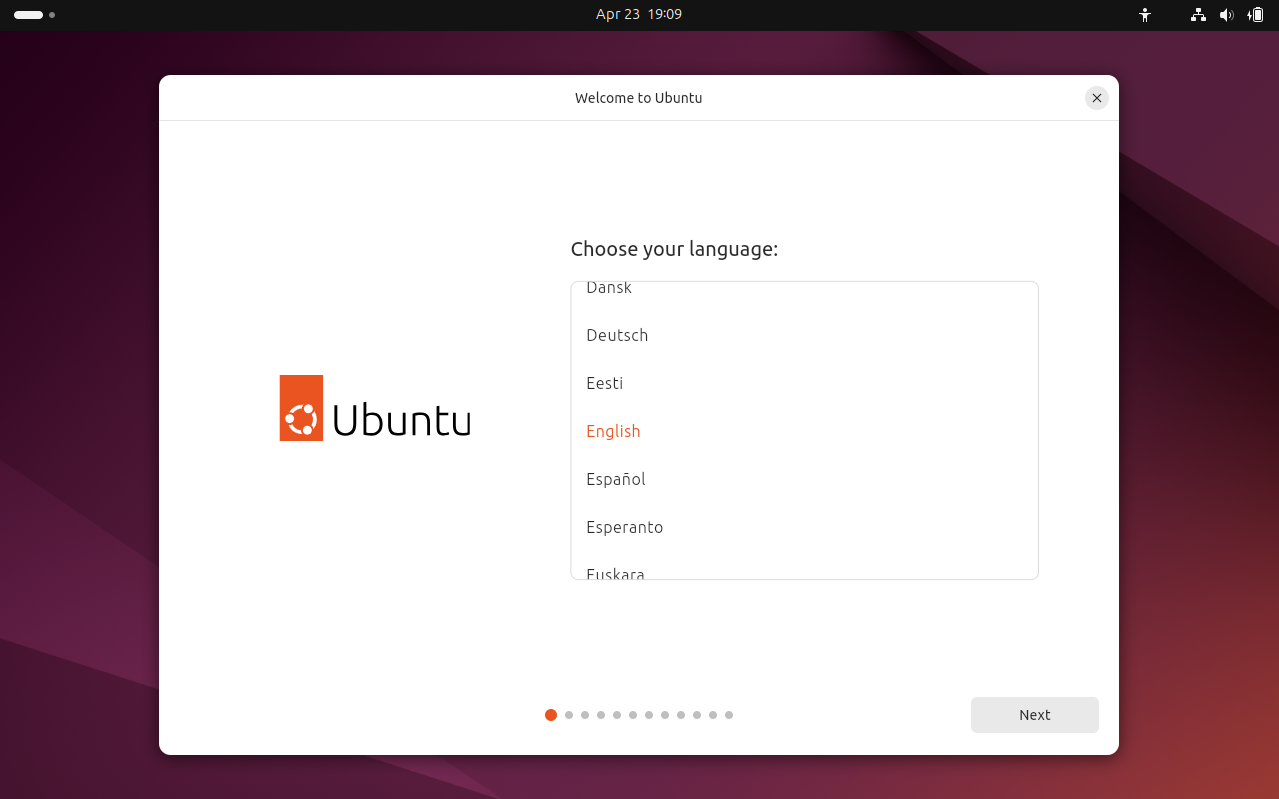
Select Language
Choose the language for the installation process. This language will be the default for the installed system. Select "English" and click "Next".
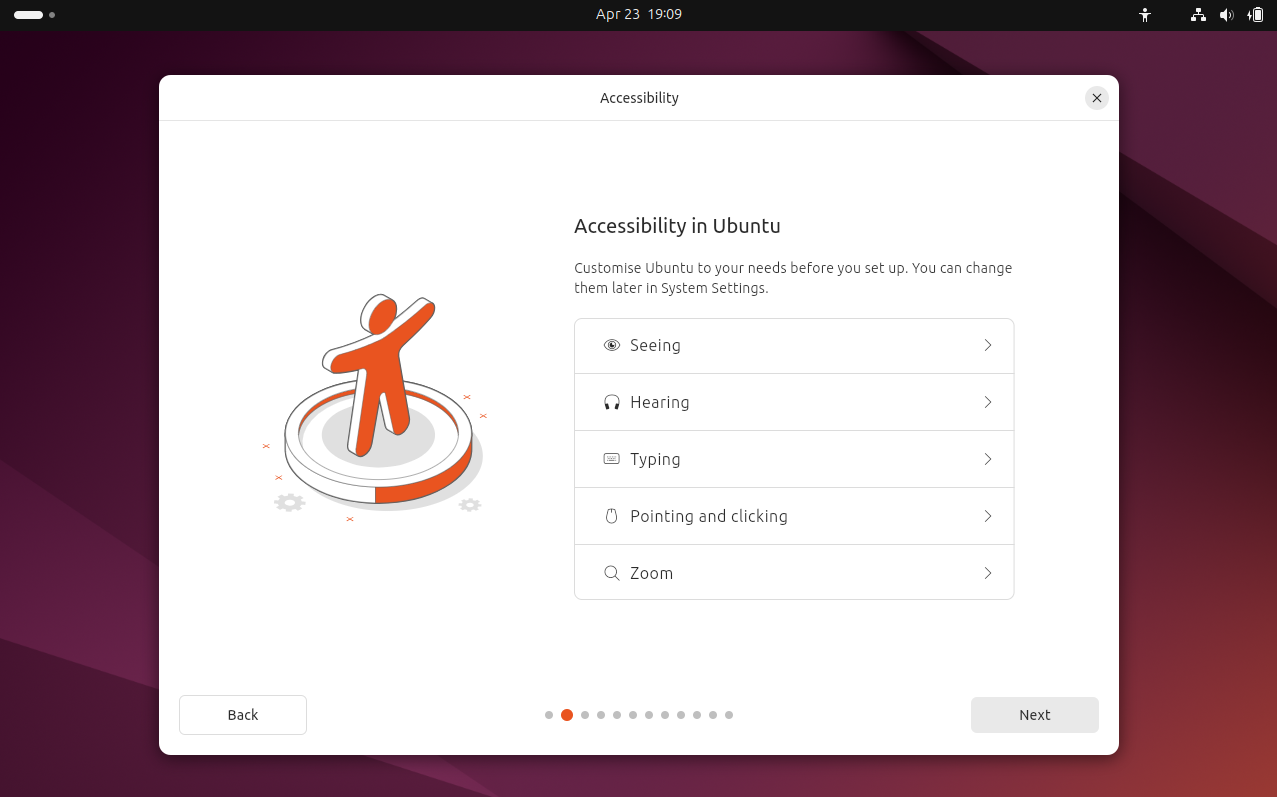
Preferences for the OS
Choose the preferences that suit your usage, adapting Ubuntu to your needs, and click 'Next'.
Keyboard Layout
Choose the installation language and keyboard layout. This will be the default layout for the system once installed. Select 'English' and click 'Next'.

Connect to the Internet
Connect to the Internet to continue the installation. If you have an Ethernet cable connected, select the 'Use wired connection' option for automatic connection. This will allow you to download updates during installation.
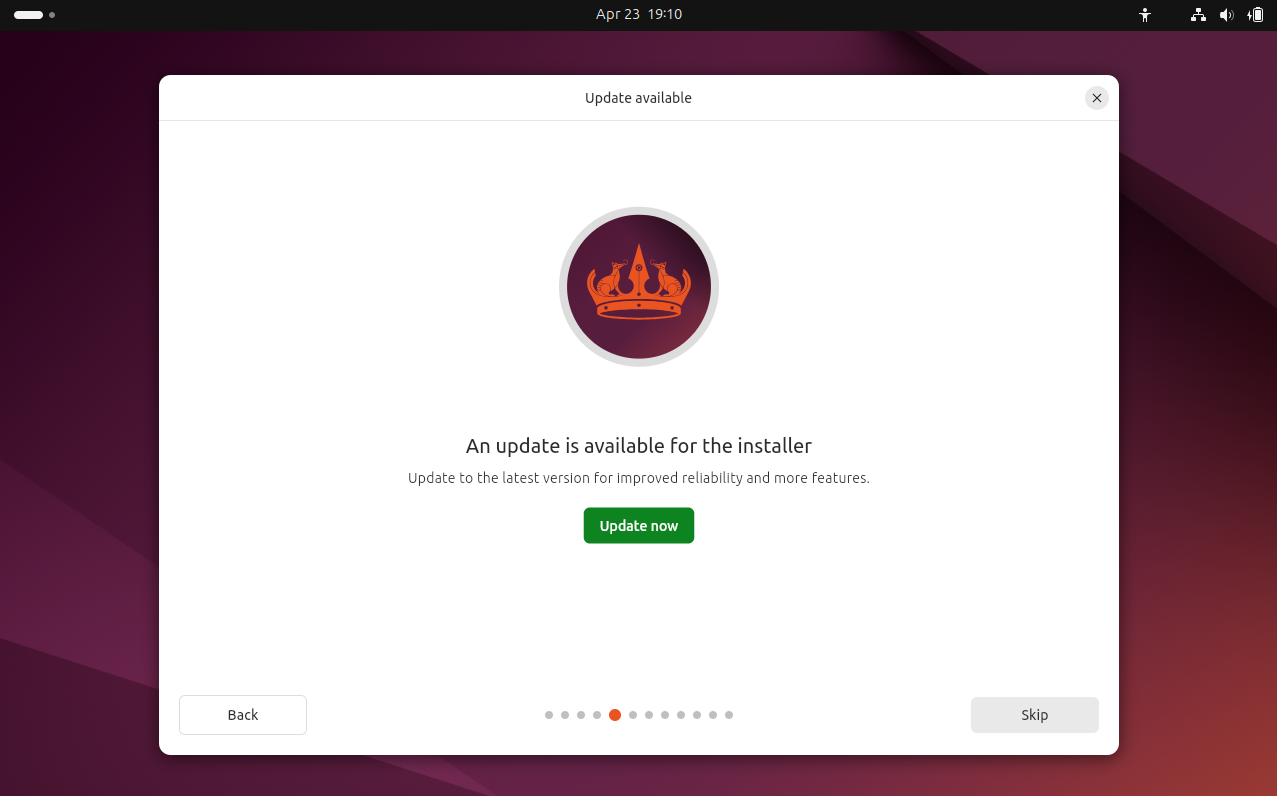
Updates
This screen offers the option to install updates during the installation process. As it is not necessary for our case, select 'Skip' to speed up the installation. Updates can be installed later from the system.

Installation Options
This step allows you to choose whether to try Ubuntu without installing it or to start the installation directly. If you're ready, click on 'Install Ubuntu'.
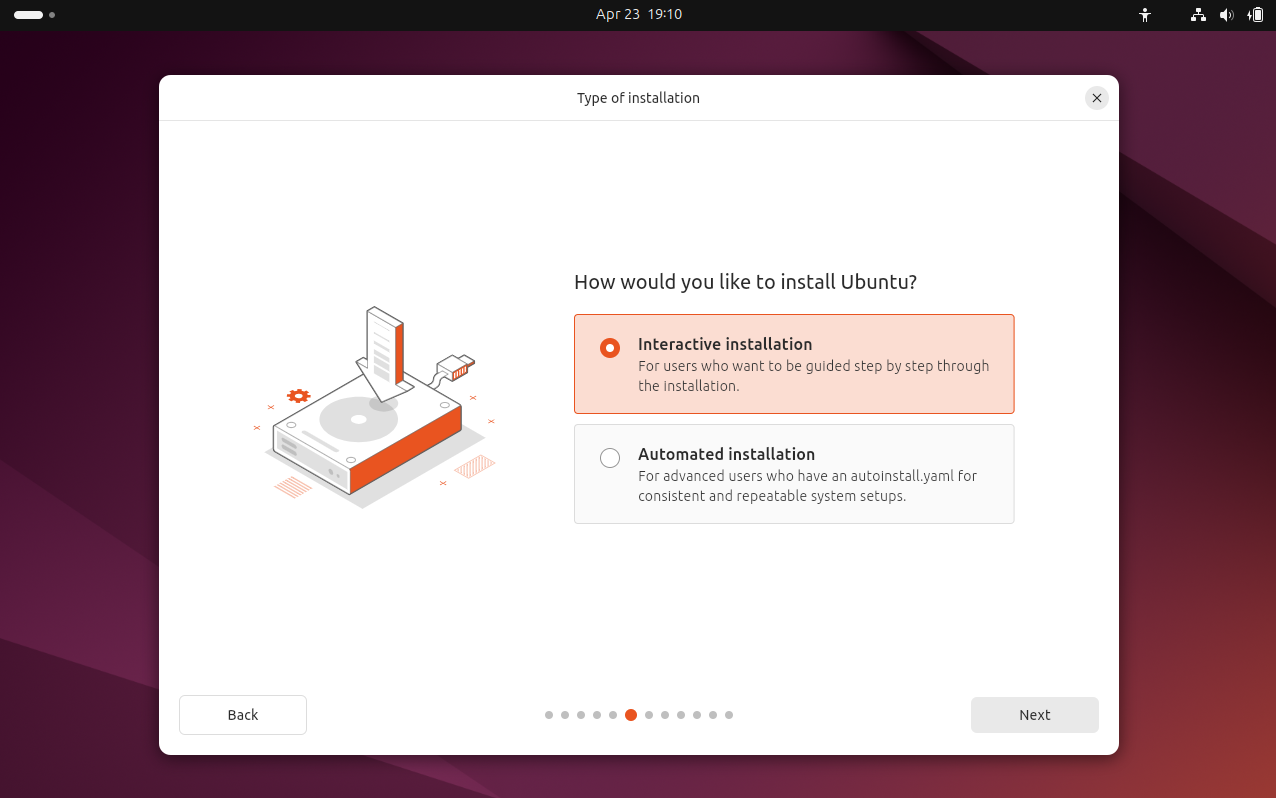
Installation Type
This screen asks whether you want an automatic or interactive installation. Choose 'Interactive Installation' to review and customize the options step by step. Then click 'Next' to continue.

Select Applications to Install
Now, it asks you which set of applications you want to install. You can choose the 'Default selection', which includes basic necessary apps, or the 'Extended selection', which adds more programs right from the start. In our case, select 'Default selection' for a lighter and faster installation.

Proprietary Software
This screen lets you choose whether to install third-party software, such as drivers for graphics and Wi-Fi devices. Check the box that says 'Install third-party software for graphics and Wi-Fi devices' and click 'Next' to continue.

Disk Setup
You are now asked how you want to install Ubuntu. Choose the 'Erase disk and install Ubuntu' option for a clean installation, which will delete everything on the disk. Then click 'Next' to continue.

Create an Account
In this screen, you need to create your user account. Enter your name, the computer's name, a username, and a password. Make sure to remember it well, as you will need it to log in and make important changes to the system. When done, click 'Next'.

Time Zone and Location
Select your time zone by clicking on the map or typing the name of your city. This will ensure that the system time is correct and will be updated automatically when necessary.

Review Your Choices
Before starting the installation, all the options you've chosen will be displayed. Review that everything is correct: language, installation type, partitioning, user account, etc. If everything is fine, click 'Install' to begin the process.

Software Installation
The Ubuntu installation has started. The process may take several minutes, during which the system will be installed on your hard drive. Be sure not to turn off your computer during this time. Once finished, you can reboot and start using your new operating system.

Installation Complete
The installation has completed successfully. You can now reboot the system to begin using Ubuntu. Click 'Reboot Now' to finish the process. Remember to remove the installation media (USB or DVD) before restarting.

System First Boot
On the first boot, the system will prompt you to log in with your user credentials. Enter the password you set earlier, and you will be taken to the Ubuntu Desktop, ready to use!
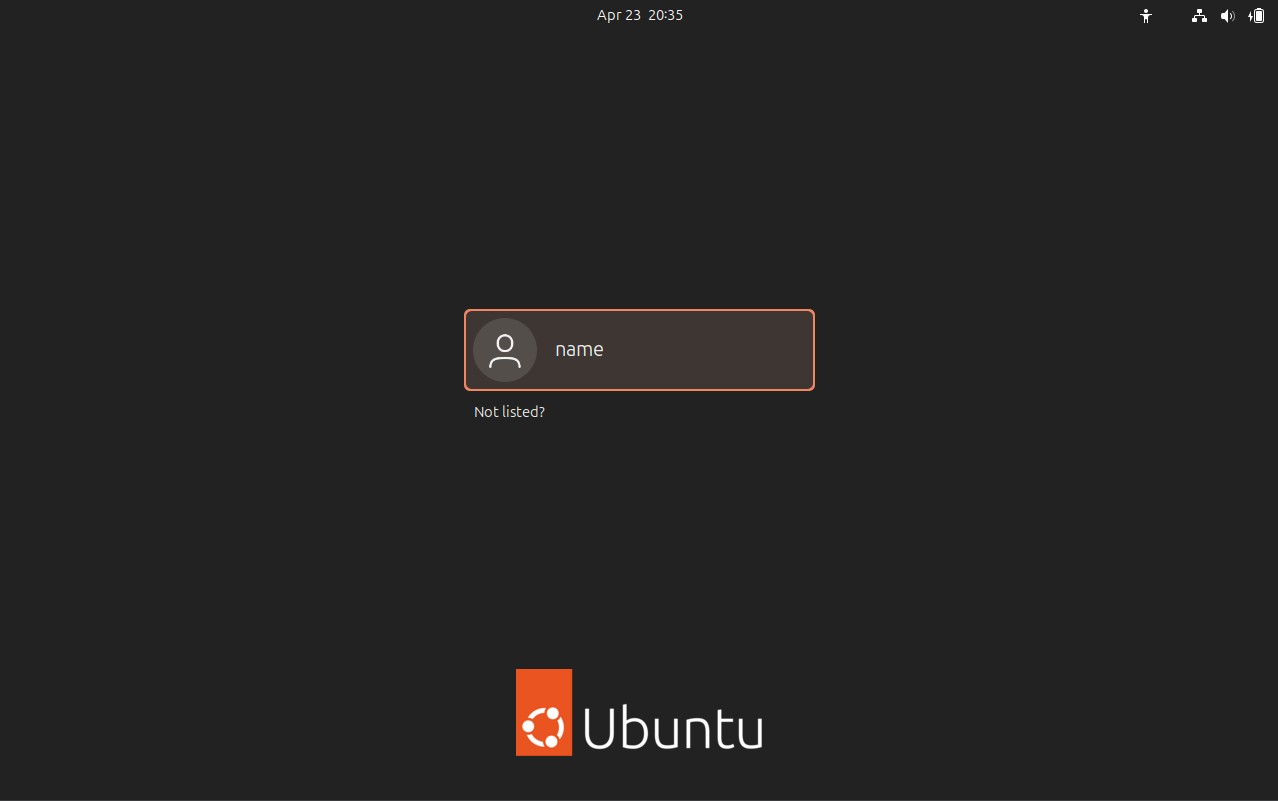
Login
You can now log in to your account. Enter your username and the password you created during installation. Click 'Log In' to start using Ubuntu and access your desktop.

Welcome to Ubuntu!
Welcome to Ubuntu! You are ready to start exploring your new operating system. In the following steps, you will be able to configure additional options, such as Internet connection and system customization. Enjoy your experience with Ubuntu!

Update the System
It is recommended to update your system to ensure you have the latest versions of packages and security improvements. Open the terminal and run the following commands:sudo apt update && sudo apt upgrade
This will download and install the available updates. Enter your password when prompted and wait for the process to finish.

Restart After Updates
After the update, you may be asked to restart the system for the changes to take effect. Click 'Restart Now' to complete the process. Be sure to save any work before doing so.

Enjoy Ubuntu
Congratulations! You now have Ubuntu 22.04 LTS fully installed and configured. Explore all the included applications and enjoy a fast, secure, and free operating system.

After installing Ubuntu Desktop, we recommend setting up a backup solution, installing the available updates, and customizing your desktop to your preferences. You can also explore tools like GNOME Tweaks to further adjust the appearance and functionality of your desktop environment.